Classic Salmon and Trout Flies
of Europe and the Americas |
 |
Biot
Bodies in Depth
Biots have been used for many
years now to create bodies, tails, wings and antennae for various flies. A
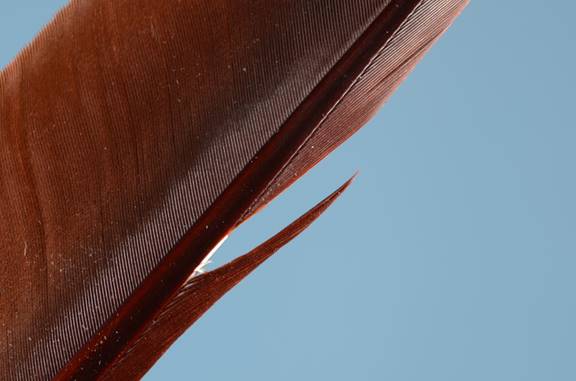
single biot, after the quill has been dyed and one biot stripped from it, looks like this:
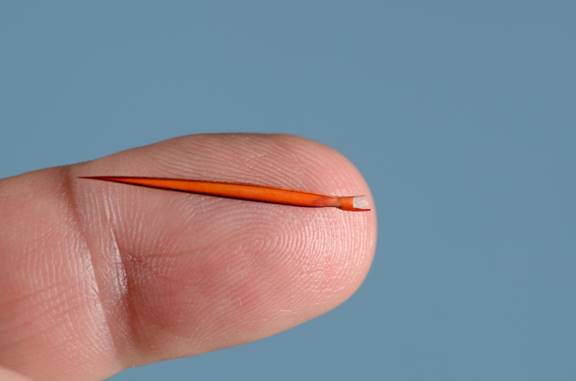
Note the "notch" on the right side, in this instance facing
down. This notch is important. If the biot is tied in
by the tip in such a way that when it's wound the notch is trailing, i.e.
facing the bend as it's wound, a smooth body will result. If tied in and then
wound with the notch leading, i.e. notch toward the eye, you'll get a rough
body. The smooth bodies are suitable for duns and spinners, the rough bodies
for emergers and cripples. There are some emergers done with smooth bodies, notably
Brooks Sprout and René Harrop's CDC Biot March Brown Emerger.
Simple enough and this has been the doctrine taught for
years and fine as far as it goes. However, several years ago I began to notice
some things. Sometimes, when winding a smooth body, I found I was winding with
the general curvature of the biot, but other times I
wasn't, and that seemed to result in a body that was difficult to finish off,
and had something of a lump at the tie off point. What was going on?
Consider these photos. Here are two biots,
facing convex side up on my finger. One has the notch up, the other down. It's
surprising that the notches don't both point the same way.
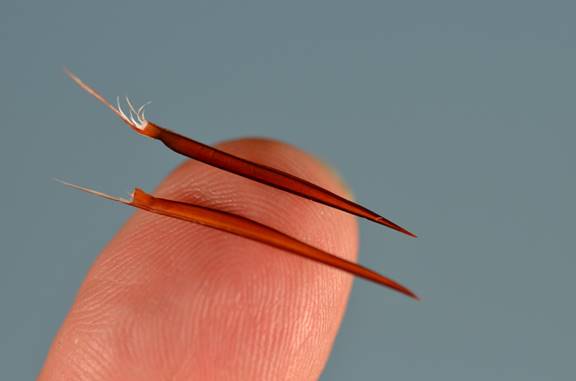
The notches point opposite each other because the top one is
from a left goose biot quill, the one on the bottom is
from a right goose biot quill.
Here are left and right goose primary feathers that have
been dyed rusty brown. The quill I'm calling the "left" is on the left side of
this picture:
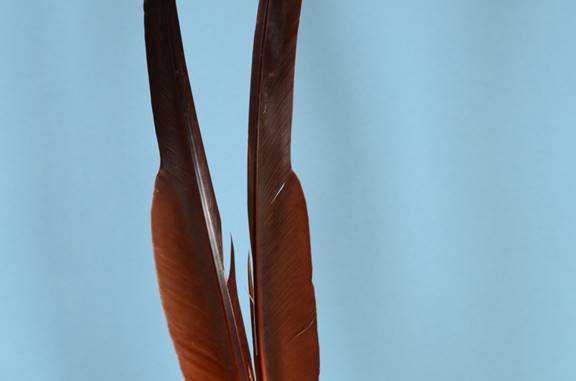
The biot section on these feathers
is the leading edge, i.e. the smaller side of the rachis or stem of the
feather. The other side of the feather, the wider one, is decidedly not the biot side, though these strands can be used for bodies at
times too (see the Pre-Hatch Baetis recipe). Here's a
close-up, and you can see where I've harvested some biots
for use in this article:
Biots harvested from the left
feather will, when wound with the natural curvature of the biot
(concave side toward the hook shank), result in a smooth body. Biots harvested from the right feather and wound with the
natural curvature of the biot will result in a rough
body. But why is it necessary to wind with the natural curvature of the biot? It's not absolutely necessary, but it is easier to
tie off and results in a better shape, especially when winding smooth bodies.
Consider the following photos:
The first shows a left biot tied
in on the far side of the hook with the convex side toward the hook. I tie many
other materials, ribbing, silk, etc. in this way. It's a very clean way to
begin winding, the first turn starting under the hook When wound, the concave
side of the biot the will be against the hook. This
means we'll be winding with the natural curve of the biot.
The biot will wind with the notch trailing. The next
picture shows the result after the biot has been
wound, a smooth body:
The next photo shows a right biot
tied in with the convex side toward the hook again, and this time the notch is
up. Tied in this way we will wind with the natural curvature of the feather
again. When this biot is wound, the result will be a
rough body, as the biot will wind with the notch
facing forward:
Next we'll wind a right biot but
this time tie it in with the concave side toward the hook, so that when wound
the convex side will be against the hook, winding against the natural
tendencies of the biot. You'll still get a smooth
body if you start with the notch down, but it will be much more difficult to
tie down, and it will result in a bit of a lump, visible in the shot of the
completed body:
The long and the short of all of this is the following: If
you want to wind with the natural curvature of the biot,
and I'm convinced it's a better way, and you want a smooth body, wind a biot from the left quill. If you want to wind with the
natural curvature of the biot, and you want a rough
body, use a biot from the right quill. Tie either one
in so the concave side will face the hook shank when wound, and you're life
will be so much easier.
I sort all of my biots into rights
and lefts now, even if they come as strips alone. To identify whether or not a
strip is from a right or a left quill, simply pull off a biot
and hold it horizontally against the tip of your finger, notch to the left, convex
or shiny side up. If it's a left, the notch will be down. If it's a right, the
notch will be up. Once you've sorted your biot strips,
tie them all in the same way, and use the lefts for smooth bodies and the
rights for rough ones. Does this apply to turkey biots
as well? It applies to all biots, regardless of the
bird.
I prefer goose biots to turkey biots as the segmentation is more distinct. That said,
sometimes a goose biot is not long enough. You may
use turkey then, or perhaps dye a quill from some other larger bird.
For years I wondered where René Harrop
found biots with such a distinct black edge. His
spinners almost looked as if he had run a black thread along the edge of the biot. The secret is Canada goose. The markings on those biots are very black. There is at least one material
supplier now dying Canada goose biot quills, but if
you know a hunter, you can dye your own. You'll need to factor in the naturally
gray color of the biot when dying. To get a PMD
color, use Jaquard Yellow Sun, to get a Rusty color, Jaquard Burnt Orange works well.
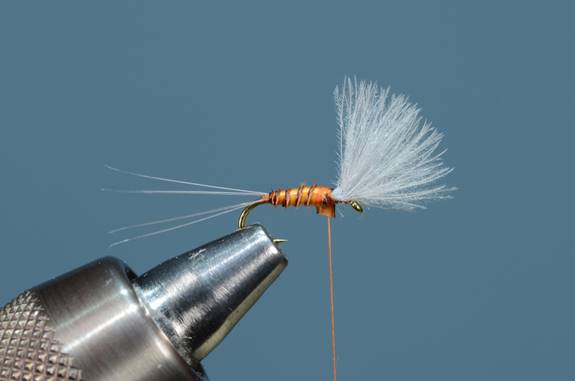
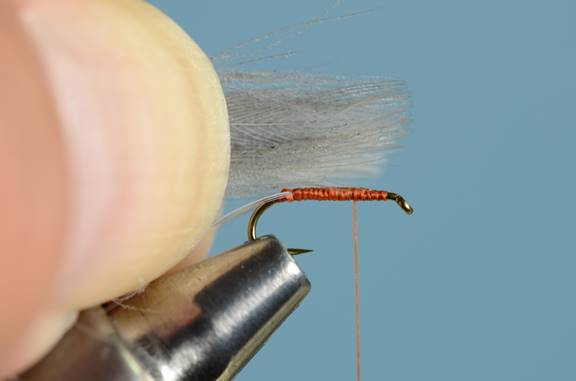
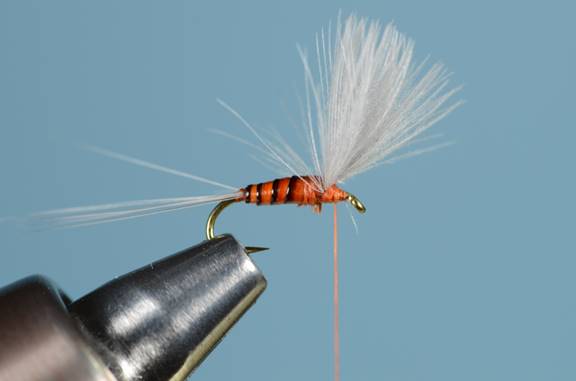
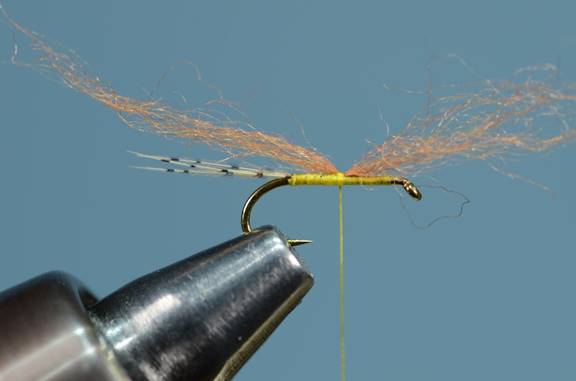
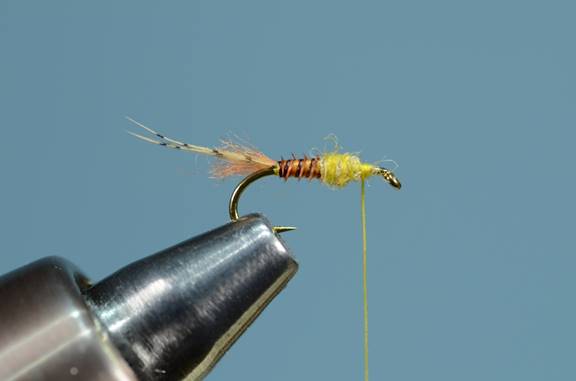
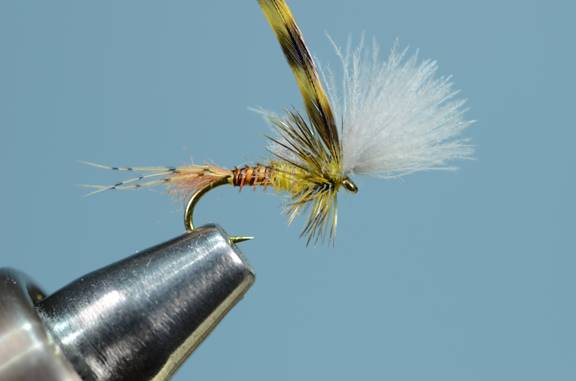
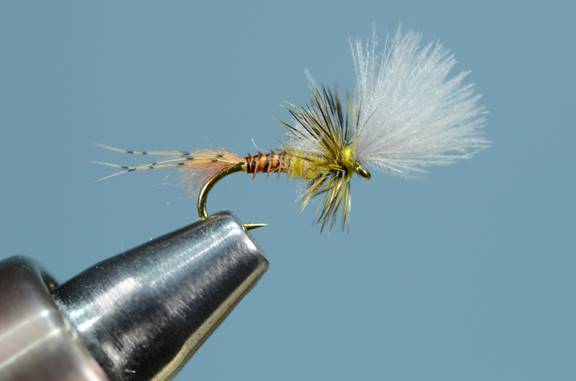
Rusty Spinner Step By Step
Step 1.
Create a split tail with what ever
method makes you happy. Here's how I do it. Wind thread to the bend. Leave a long
tag end of thread hanging off the back. Create a small thread ball at the rear
and then spiral thread forward to about the 1/3 position on the shank.

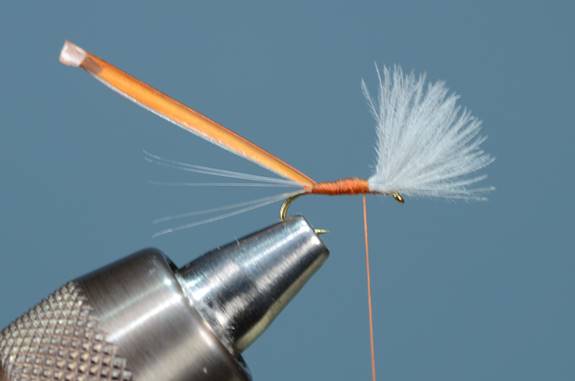
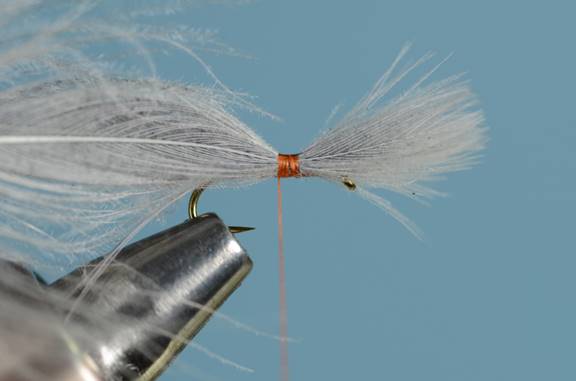
Step 2.
Measure 6-8 hackle fibers or 4 microfibbets
to full hook length. Tie them in and wind thread halfway back to the tail to
secure them.
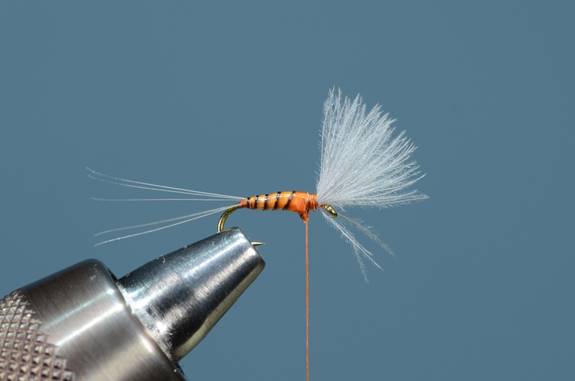
Step 3.
Pull the thread tag forward, splitting the tail fibers
evenly. Tie the thread tag down on your side of the hook under tension. This will
lock in the near tail fibers. Hold the far tail fibers in place and wind back just
to the thread ball. The tails should be hook length or even longer on a
spinner.

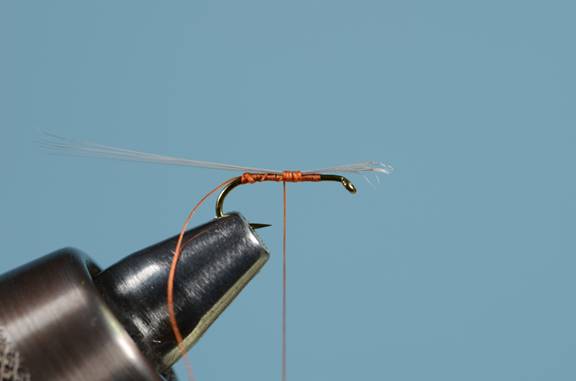
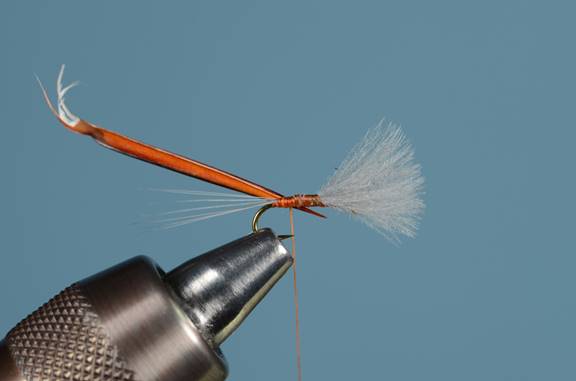
Step 4.
Trim the hackle butts and thread tag. Take the thread all
the way forward to the eye, then back to about the 1/3 point on the shank. On a
#18 hook this is 6 or 7 turns.

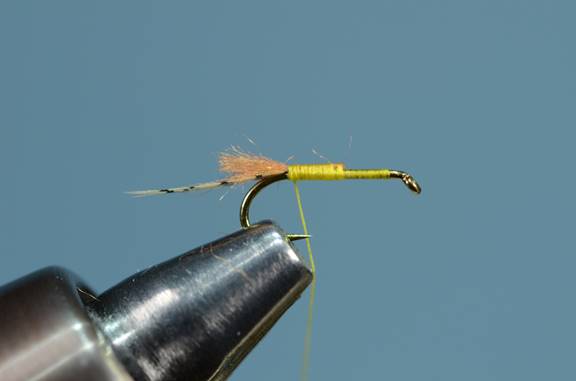
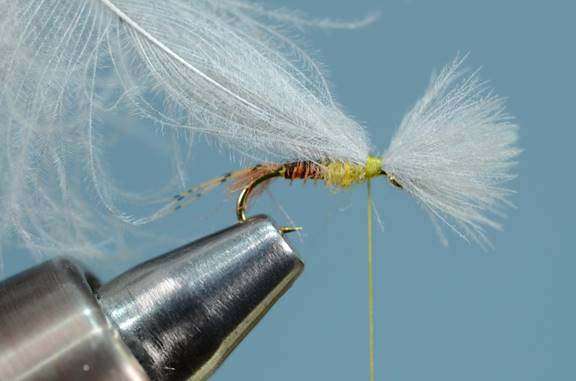
Step 5.
Take 2 light dun CDC feathers and hold them back to back so
the tips splay out. Measure them against the hook shank. We want them to be
about hook length when tied in.
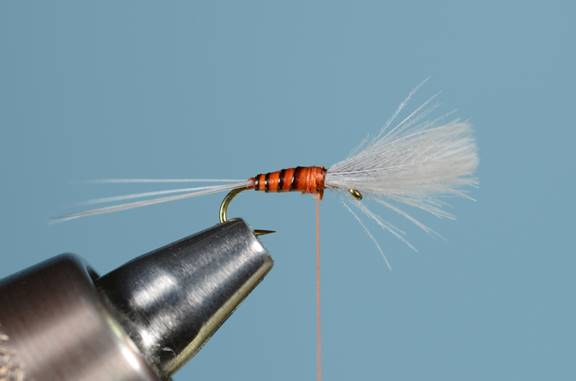
Step 6.
Tie them in vertically on top of the hook. Bind down with 4
or 5 wraps back toward the bend.
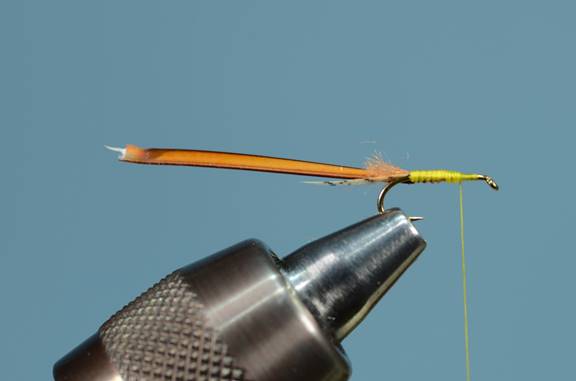
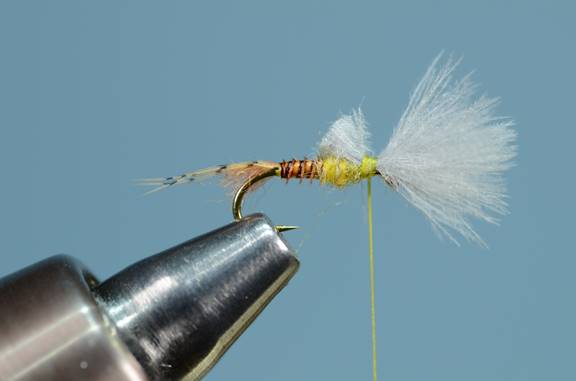
Step 7.
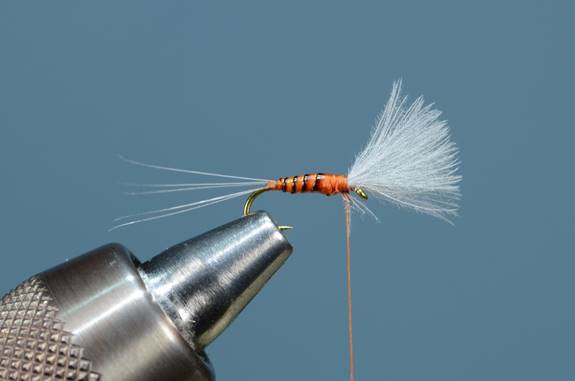
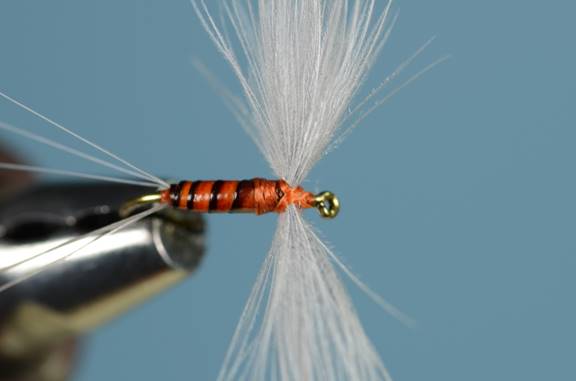
Cut the butts off at an angle, and bind down all the way to
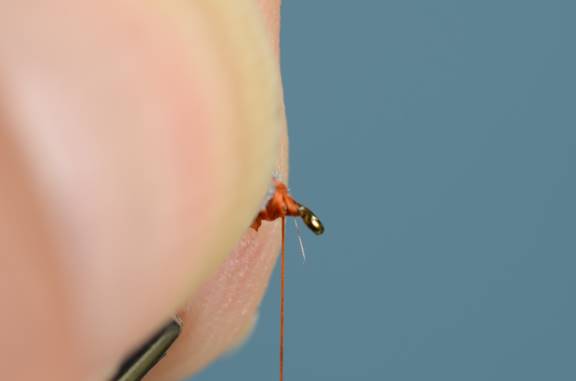
the tail. Try to create a tapered underbody. Tie in a biot
from a left biot quill by the tip on the far side of
the hook. Tie it in so the convex side is toward the hook shank. The notch
should be down. If it's not, you have a biot from a
right quill, or you have the concave side toward the shank.
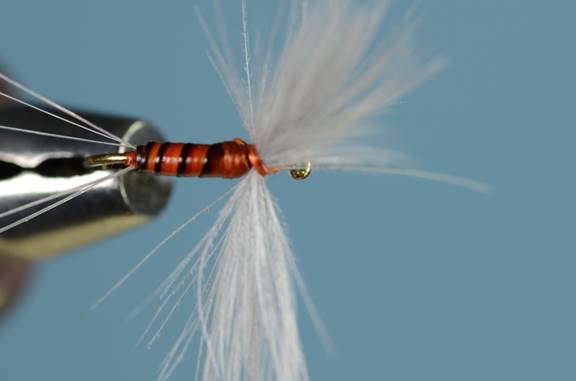
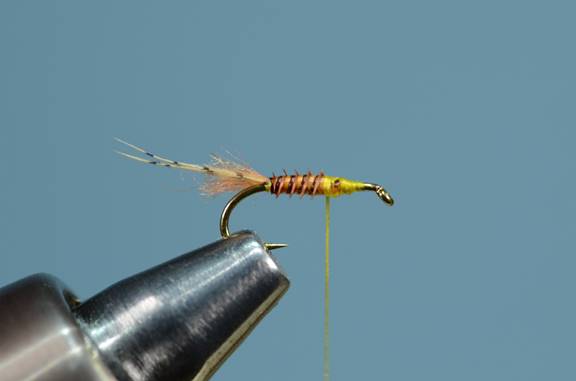
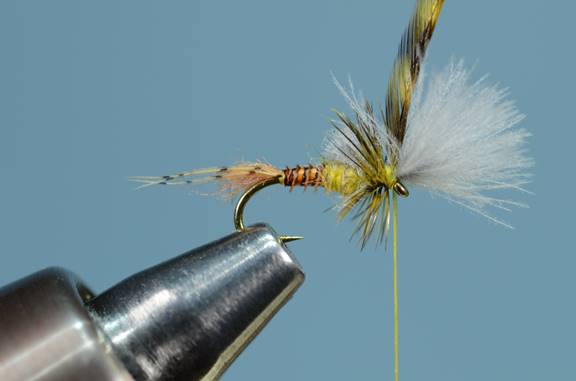
Step 8.
Wind the biot forward using hackle
pliers and tie off.
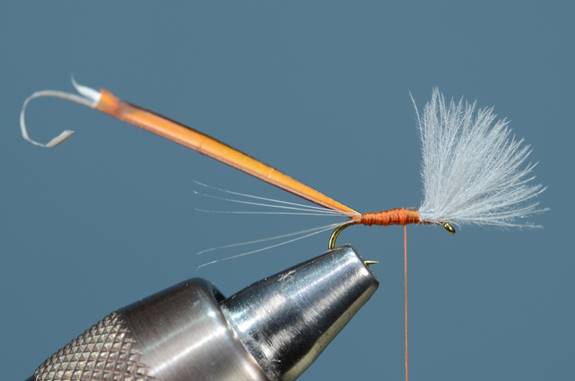
Step 9.
Post the wings up by holding them vertically with the left
hand and making 10 or more wraps in front of them. Be sure to wind down to the
eye every so often, and back up, to make a gradual taper.
Step 10.
Separate the wings out into the two original CDC feathers,
by pinching and forcibly moving the wings into a spent position. Hold the near
wing in place with the left hand and take 4 diagonal wraps, front to back,
moving up the wing. Try not to affect the far wing at all as you do this.
Step 11.
Here is a top view
close-up, showing the diagonal wraps across the near wing in the center. These
will help keep the wing in place. Take one wrap behind the wings.
Step 12.
Now take 4 diagonal wraps back to front, while holding the
far wing in place. Try not to affect the near wing. This should be the result:
Step 13.
Place a number of thread wraps right in front of the wings
while holding them back on top of the shank as shown. Then let go and take a number
of wraps right behind the wings. We want to secure these with thread wraps, not
rely on dubbing to do it later.
Step 14.
Position the thread at the rear of the thorax, and then
begin to dub forward. When you get in front of the wings, duplicate the same
diagonal thread wraps you did previously only this time with dubbed thread. You
may only need a couple of diagonal wraps each direction. The thorax should be
rather robust, but be careful to not crowd the eye with dubbing. Whip finish at
the eye. The wings should angle up just slightly, 10 degrees or so. That makes
this fly very easy to spot on the water
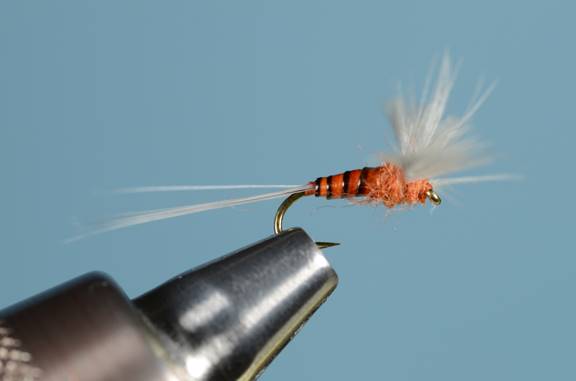
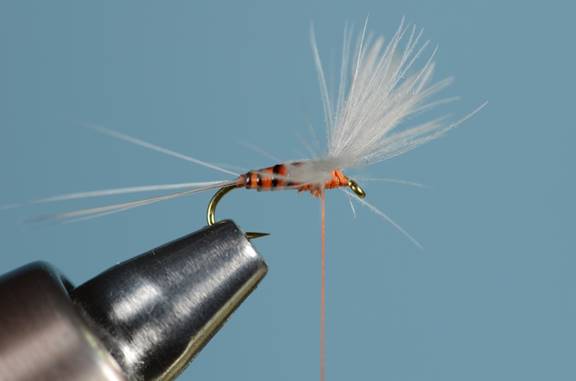
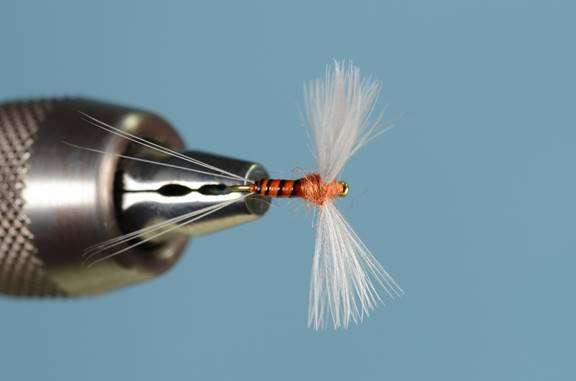
Step 15.
Here's what the fly should look like from the top.
The Last Chance Cripple Step by Step
Step 1.
Start the thread just in back of the eye and wind back to
the bend. Tie in 3 well marked wood duck flank feathers to create a tail that's
about ¾ the length of the hook shank. Take the thread forward to the midpoint
of the shank.
Step 2.
Tie in a piece of rusty dubbing that has been formed into a
noodle by spinning between the thumb and middle finger.
Step 3.
Fold the dubbing back over itself and wind thread to the
bend. Cut the dubbing roughly to create a shuck.
Step 4.
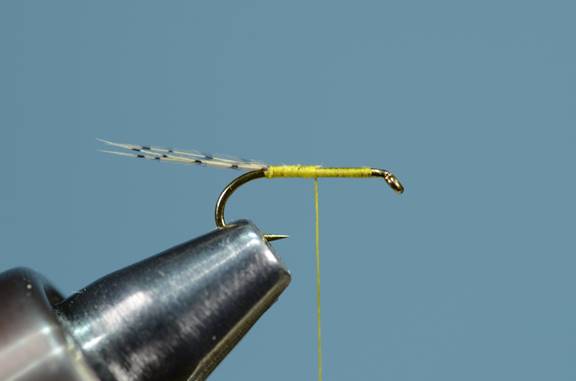
Tie in a right biot on the far
side of the hook, convex side against the hook. Take the thread up to the 1/3
point on the shank.
Step 5.
Wind the biot forward with hackle
pliers to the halfway point of the shank and tie off. Be sure not to go any
more than halfway, space is at a premium from here on.
Step 6.
Finely dub a long piece of thread with PMD dubbing and then
wind an egg shaped thorax. Try to confine it to the 2nd quadrant of
the shank, leaving the first ¼ of the shank for the wing and hackle.
Step 7.
Hold two pieces of light dun CDC between the thumb and
middle finger of the left hand, back to back, tips forward and splayed out. Tie
them directly on top of the hook with a pinch wrap and then take 4 wraps back
toward the dubbing ball, securing the wing on top of the hook.
Step 8.
Clip the butt ends straight up and down at the end of the
thorax, as shown.
Step 9.
Tie in a piece of PMD dyed hackle one size smaller than the
hook. This hook is an 18, so I've used a #20 hackle. Wind the hackle forward
and trap it by taking a wrap behind it as you hold it up, then in front of it,
then behind it again.
Step 10.
Take one wrap in front of the wings at the eye, then one
behind the wings, then whip finish just behind the eye, in front of the wings.
Cut the thread.
Step 11.
Finally, trim the hackle stem carefully. Find the stem with
the slightly opened tips of your scissors and cut it. You're done!
Background image from "Trout" by Bergman (1938)