Classic Salmon and Trout Flies
of Europe and the Americas |
 |
Tying
the Humpy
After playing with some Humpies over the course of a
couple of weeks I've found that a couple of wraps around the base of each wing
after setting them with my method doesn't hurt. If you don't do this the
resulting wings can be a bit incoherent once you've wound the hackle. The same
applies to wings made from calf body hair. Humpies are not a fly I've tied much
over the past 20 years or so; I just don't fish them on the slower water I
frequent. I've settled on a method Charlie Craven uses for doing these. He ties
in the tail, then uses a separate bunch of deer or elk hair to tie in the wing.
You can then control the bulk of the hump by trimming out a lot of the hair
once the wing is tied in. You can also control the wing height exactly with his
method. One thing that I've learned is how critical the thread is. I've seen
many references to 70 denier UTC thread, or 6/0 Danville thread in recipes, and
yes, they can work. That said, you will spend a lot of time twisting up the
thread to make it strong enough to mount the wing and tail exactly where you
want them. Wing placement is important to the success of this fly and the
thread must be wound forcefully so the wing doesn't move after tie in. What
works best for me is Lagartun 74D or 74 denier thread. You can really crank
down hard with this thread and your wing placement will stay put at exactly the
1/4 shank mark. It is finer than either the UTC (denier ratings aside) or
Danville, and much stronger. 50 denier GSP can also work, but the I find the
colors are not as vibrant as the other threads mentioned. The hair used is
important as well. Long and fine are the hair's most important attributes.
Step
1. Wind
thread back to the bend, then unwind it 3 turns. If you tie in the tail right
at the bend, you run the risk of the thread showing between the hump and tail
later. Tie in a tail of either yearling elk or long fine deer hair. The tail
should be about shank length. Take the thread forward to exactly the 25% point
of the shank. I like to count the thread wraps as I wind back from the eye.
That gets me there exactly every time assuming I've gotten it right once. If
you miss the wing placement by just a little, you'll run into trouble with the
hackle later.

Step
2. Tie
in a bunch of cleaned and stacked hair. Be sure that all the short fibers are
gone. Wing should be shank length or a touch longer.

Step
3. Trim
out 1/2 to 2/3 of the hair.

Step
4. Bind
down the hair on top of the hook all the way back to where the bend starts
using your tying thread. If you don't go all the way back, the thread will show
between the tail and hump when you fold the hair forward.

Step
5. Fold
the butts of the hair forward to form the hump. Bind down just behind the wing
and trim. Leave room for hackle behind the wing.

Step
6. Post
up the wing with wraps in front, then continue wrapping almost to the eye and
back. Repeat this process until the wing is upright.

Step
7. Use
my method to separate the wings. Then, take a couple of turns clockwise around
the base of the far wing and pull it up a little so it's a bit more upright.
Pull the thread toward you, and wrap it over and
around the shank behind the wings. This turn will be in the opposite direction
that you normally wind. Now take a couple of turns clockwise around the base of
the near wing, and pull it up a bit. Wrap thread to
the hump.

Step
8. The
wings should look like this from the side.

Step
9. To
achieve dense and compact hackle, try the following: Start by mounting a brown
and grizzly hackle together, bottom sides (concave sides) facing each other,
the brown hackle to the rear. Leave some stem visible so that each hackle will
start cleanly when wound. The idea here is that the strands on the brown hackle
will cup forward a bit when wound, and the grizzly strands will cup backward
when wound. Station the thread halfway between the wing and the eye.

Step
10. Wind
the brown hackle first. Take two turns spaced very closely together behind the
grizzly hackle. Then take a turn halfway to the back of the wing in front of
the grizzly. Then pull the wing back and take the next wrap right in front of
it. Finally, take a 5th wrap right to where your thread is
stationed. Tie off this hackle on the bottom with 3-4 wraps forward. The hackle
will move up due to thread torque and wind up on your side of the hook just
behind the eye. Trim it there, and take the thread to
a point about halfway between the brown hackle and the eye. As you can see, we've created spaces between
the brown wraps in which to wind our grizzly wraps.

Step
11. Wrap
the grizzly hackle forward, trying to cover the 3 green spaces. Take 2 more
wraps right in front of the forward-most wrap of brown hackle. The idea behind
this method is to form “bookends” of hackle that contain the rest. The two
close wraps of brown at the back cup forward, constraining strands in front of
them. The two close wraps of grizzly in the front cup backwards, constraining
strands behind them. The result is compact collar that doesn't have strands
going everywhere.

Step
12. Here
are the divided wings from the front.

Humpy
Recipe
Hook: TMC 100BL or similar dry fly #6-18
Thread: Lagartun 74D or UTC 70 in fluorescent orange,
yellow, green, or red
Tail: Yearling elk or long fine deer hair
Wings and Hump: Yearling elk or long fine deer hair
Abdomen: Thread
Hackle: Brown and grizzly saddle hackle
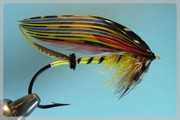
Background image from "Trout" by Bergman (1938)