Classic Salmon and Trout Flies
of Europe and the Americas
Hand Whip Finish Tutorial

I was somewhat taken aback recently when I looked at a number of internet tutorials and videos on the hand whip finish and noticed that virtually all of them use a method that I used years ago. At some point in my own tying I changed to another, slightly different approach, one I found in Dave Hughes' book "American Fly Tying Manual". He also has a very nice description in "Trout Flies" as well, a book that came along later. The concept is the same, but I find Hughes' method to be superior, especially at the start of the whip.

Over the years I've heard from tiers who use the whip finish tool who say that they find the tool to be more precise. This is simply because they are using the more popular method of hand whipping. It is true that with the conventional method there is a loop formed around the hook at the beginning that is difficult to control. To see what I mean, watch Gary and Jason Borger's video on-line at http://www.flyfisherman.com/ftb/jbwhip/. Note the large loop formed at the beginning, after the first wrap. This can lead to loss of control. 
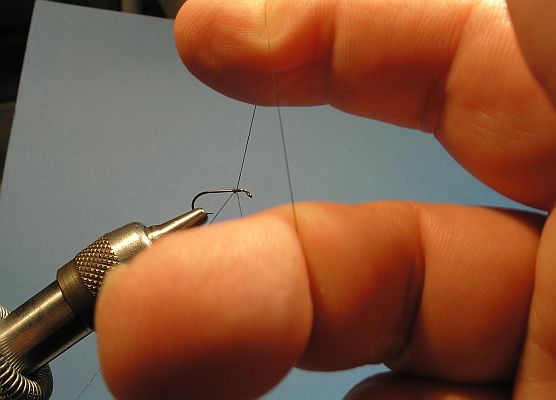
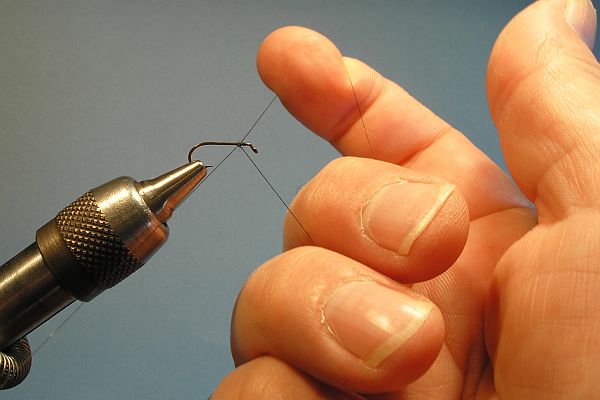
With the method described by Dave Hughes there is no such problem, and it is possible to completely control the placement of all wraps. If you use a tool I will not try to talk you out of it, it's a very good method. There is a convenience and flexibility with the hand whip finish however that I would not trade for the world. If you use the conventional method of hand whipping, give this a try. I did, and changed the way I whip finished a fly right then and there.

Here is a video of how I execute the Hand Whip Finish on a conventional dry fly and here is a video of the Hand Whip Finish on a Parachute Dry.


Step-by-Step Instructions


Step One

Step One
Bring the first two fingers of your right hand up underneath the thread, so that the thread crosses the BACK of the two fingers at the angle shown. It's important to always keep the thread always under some tension through these steps. I will typically bend the hook shank slightly because I use so much tension.


Step Two

Step Two
Rotate your right hand slightly clockwise, and grasp the thread close to the hook with the pads of your two fingers. The thread will at this point still be across the back of your fingers, and also be grabbed by the pads of your fingers as well.


Step Three

Step Three
Here you can see that I've rotated my hand a bit more (thumb going to the right) and have formed a loop around my fingers.


Step Four

Step Four
I've rotated my hand around now to the point that the pads of my fingers face me, as does the palm of my hand. This is beginning phase of each whip. Note how the thread crosses itself.


Step Five

Step Five
This is the point where this method separates itself from the conventional one. Here I've forced the crossing point of the thread hard against the hook, precisely where I want the hand whip to start. I've spread my fingers slightly, preparing to straddle the hook with the upper and lower sections of thread, and moved my hand away from me, parallel with the hook. I like to call this "assuming the position", as it's key to starting each whip around.


Step Six

Step Six
Here I've moved my hand to the far side of the hook, straddling it with the upper and lower sections of thread. My hand is now behind the hook, in relation to my body.


Step Seven

Step Seven
Now begins the magic move. This is typically done on the near side of the hook with the other method, but is done on the far side of the hook with this method. I've started to move my thumb to the left here. I'll show this in a sequence of four photos. You are rotating your hand counter clockwise, thumb moving to the left. As you do this you are trying to grab the bottom thread with the pads of your two fingers.


Step Seven

Step Seven

Step Seven

Step Seven


Here I've moved underneath the hook, and toward myself.


Step Eight

Step Eight
Now I've once again "assumed the position", and am ready for another whip.


Step Nine

Step Nine
I've now straddled the hook again, and am on the far side of the hook, ready for another "magic move".


Copyright © 2006 Eric Austin
Background image from "Trout" by Bergman (1938)